
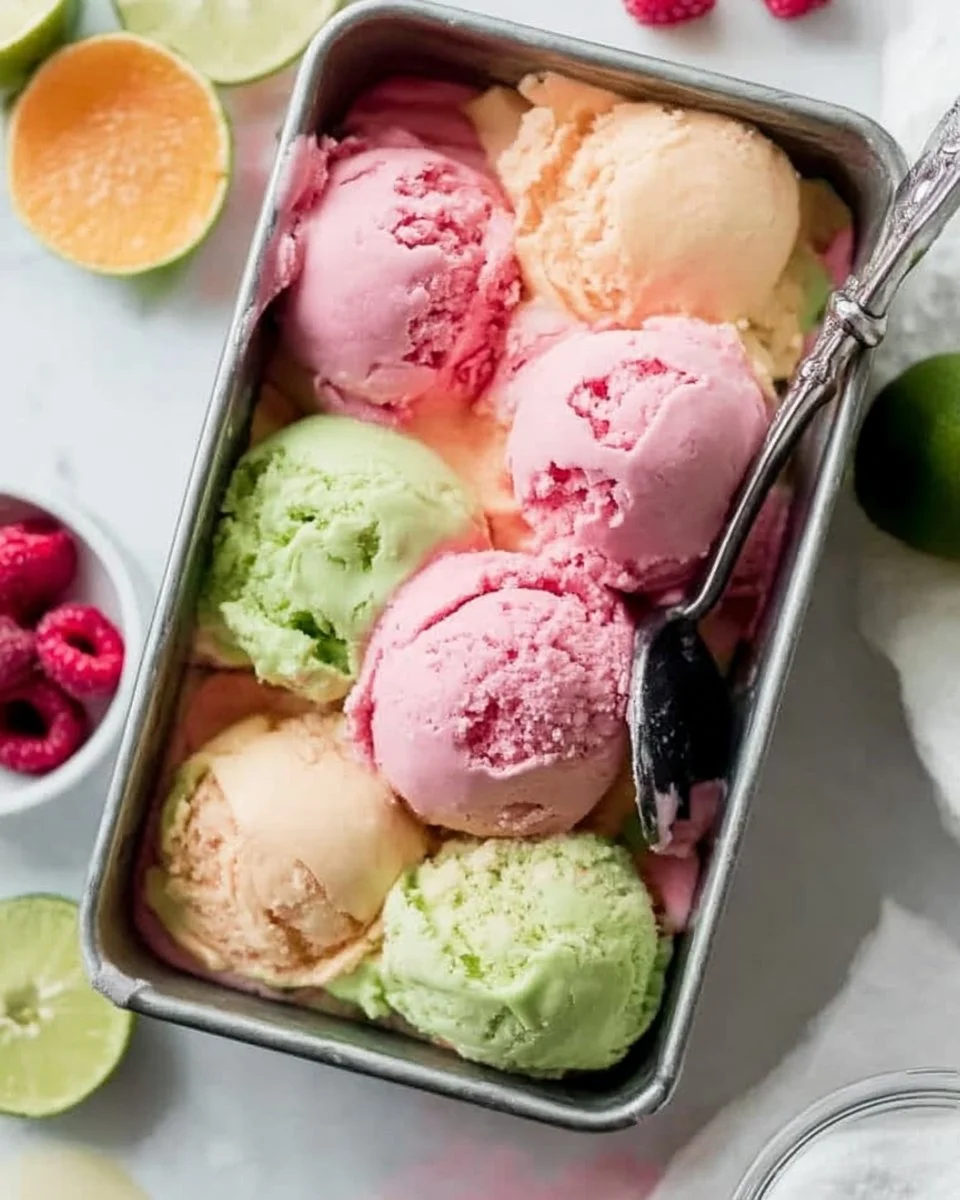
Summer is the perfect season for refreshing treats, and what better way to cool off than with a vibrant bowl of homemade rainbow sherbet? This delightful dessert is a feast for the eyes and the taste buds, offering a medley of fruity flavors that are sure to bring a smile to anyone’s face. With its creamy texture and fruity essence, it’s an ideal choice for warm afternoons, birthday parties, or simply as a sweet way to enjoy a sunny day. Making your own sherbet at home is not only satisfying but also allows you to customize flavors that suit your family’s taste. You’ll find that this recipe is simple enough for even the novice cook, and the results will have you basking in compliments from friends and family.
What Makes This Recipe So Appealing
This homemade rainbow sherbet recipe is fantastic for several reasons. First, it’s incredibly easy to whip up, requiring just a few basic ingredients that you may already have in your kitchen. It’s also a budget-friendly dessert option, allowing you to create a delightful treat without breaking the bank. The vibrant colors and varied fruit flavors create an eye-catching dessert that is as fun to make as it is to eat. Plus, it’s completely customizable—whether you like tangy lime, sweet raspberry, or tropical pineapple, you can mix and match flavors to suit your preferences. The best part? You won’t just get a dish that tastes good; you’ll also score a hit with kids and adults alike!
How This Delicious Treat Is Made
Creating your own rainbow sherbet is as straightforward as it is gratifying. The process begins with combining your chosen fruit juices and sugar in a bowl, allowing the sugar to dissolve completely. Once your mixture is sweetened to perfection, you’ll add in creamy milk and heavy cream along with a hint of vanilla extract. For those looking to kick it up a notch, fruit purees can be mixed in to deepen the flavors. The magic happens in the ice cream maker, where your creamy mixture is churned to a soft, fluffy consistency. After a few hours in the freezer, your sherbet will harden to the perfect scoopable texture. It’s a fun and rewarding process from start to finish!
Ingredients
Prep Time: 15 minutes
Cook Time: 0 minutes
Total Time: 4 hours 15 minutes (includes freezing time)
Servings: 6-8 servings
- 2 cups fruit juices (like orange, raspberry, lime, and pineapple)
- 1 cup sugar
- 1 cup milk
- 2 cups heavy cream
- 1 teaspoon vanilla extract
- Fruit purees (optional, for added flavor)
The fruit juices you select can significantly affect the sherbet’s flavor profile, so feel free to choose your favorites or explore seasonal fruits. The sugar not only sweetens the mix but also helps to create that smooth texture we love in ice cream. The addition of milk and heavy cream contributes to the luscious creaminess of the sherbet, making it truly indulgent.
Step-by-Step Instructions
Creating homemade rainbow sherbet is a fun and straightforward process, perfect for a summer day. Follow these steps to ensure your dessert turns out perfectly:
- In a bowl, combine the fruit juices and sugar, stirring until the sugar is dissolved. This is essential for a smooth texture, so make sure it’s fully mixed.
- Add the milk, heavy cream, and vanilla extract; mix well until everything is thoroughly blended. The vanilla adds a nice aromatic touch that enhances the other flavors.
- If using, blend in any fruit purees for additional flavor. You can create a swirled effect by drizzling it in just before pouring the mix into the ice cream maker.
- Pour the mixture into an ice cream maker and churn according to the manufacturer’s instructions until it reaches a soft-serve consistency. This typically takes about 20-30 minutes.
- Transfer the sherbet to an airtight container and freeze for at least 4 hours to harden. This will help it firm up nicely, making it scoopable.
- Serve scoops of rainbow sherbet in cones, bowls, or use it in a punch bowl with soda and other fruit juices for a festive look. Add fresh fruit pieces on top for an extra flair!
Remember, while churning, don’t skip the step of checking for the soft-serve consistency—this ensures that your sherbet is creamy and enjoyable. If you don’t have an ice cream maker, you can still make this treat by placing the mixture in a shallow pan and stirring it every 30 minutes until it’s firm.
Creative Ways to Serve This Treat
Rainbow sherbet can be served in a multitude of appealing ways. Here are a few ideas to make your presentation even more exciting:
- Serve in colorful ice cream cones to add an extra vibrancy to the experience.
- Use bowls to present it as a layered dessert—alternate layers of different fruit flavors for an even more stunning look.
- Create a sherbet float by adding scoops of rainbow sherbet to soda or sparkling water, perfect for summer parties.
- Pair it with fresh fruits or a drizzle of chocolate sauce for an elegant dessert during gatherings.
This scrumptious sherbet is not just a treat; it’s a show-stopping dessert that can elevate any occasion. Whether you’re hosting a barbecue, kids’ birthday party, or just having a relaxing day at home, rainbow sherbet is the perfect addition.
How to Keep Your Sherbet Fresh
Wondering how to store your homemade rainbow sherbet? Here are a few tips:
- Transfer any leftover sherbet to an airtight container to prevent ice crystals from forming and maintain its smooth texture.
- Store it in the freezer, where it can last for up to two weeks. After that, it’s best enjoyed fresh!
- If you want to serve it later, let it sit at room temperature for a few minutes before serving. This will make scooping much easier.
Avoid leaving your sherbet out on warm counters, as this can lead to rapid melting and undesirable texture changes.
Essential Tips for Success
To ensure your homemade sherbet turns out perfectly every time, check out these helpful tips:
- Make sure to use fresh fruit juices for the best flavor. Store-bought juices can work, but fresh is always better.
- Experiment with different fruit combinations to discover unique flavors that your family loves.
- Be patient during the freezing phase; letting it freeze adequately ensures the best texture.
- Churn the mixture thoroughly to incorporate air, which contributes to the fluffy texture.
Avoid over-churning in the ice cream maker to prevent it from becoming too icy. It should reach a smooth, creamy consistency.
Exciting Variations to Try
Feel free to customize your rainbow sherbet with these delightful variations:
- Use coconut milk instead of regular milk for a dairy-free version.
- Try adding yogurt for a tangy twist that pairs beautifully with fruit.
- Incorporate herbs like mint or basil to elevate the flavor profile.
- Create a chocolate chip rainbow sherbet by folding in mini chocolate chips right before freezing for a delicious crunch.
The options are endless! You can even experiment with seasonal fruits to ensure your sherbet changes with the timeline, creating a fresh twist each time.
Your Questions Answered
Here are some frequently asked questions that might help clarify any doubts:
- Can I make this sherbet without an ice cream maker?
Yes! You can pour the mixture into a shallow dish and stir every 30 minutes until it reaches your desired consistency. - How long does homemade sherbet last in the freezer?
When stored properly in an airtight container, it can last for up to two weeks. - Is it possible to make this recipe lower in sugar?
Absolutely! You can reduce the sugar or use a sugar substitute if desired, but adjust to taste. - Can I use frozen fruit for this recipe?
Using frozen fruit can work as well; just allow it to thaw and blend to maintain that smooth consistency.
This recipe for homemade rainbow sherbet is sure to become a staple in your summer dessert rotation. Enjoy the lively flavors and creative ways to present this delightful treat!