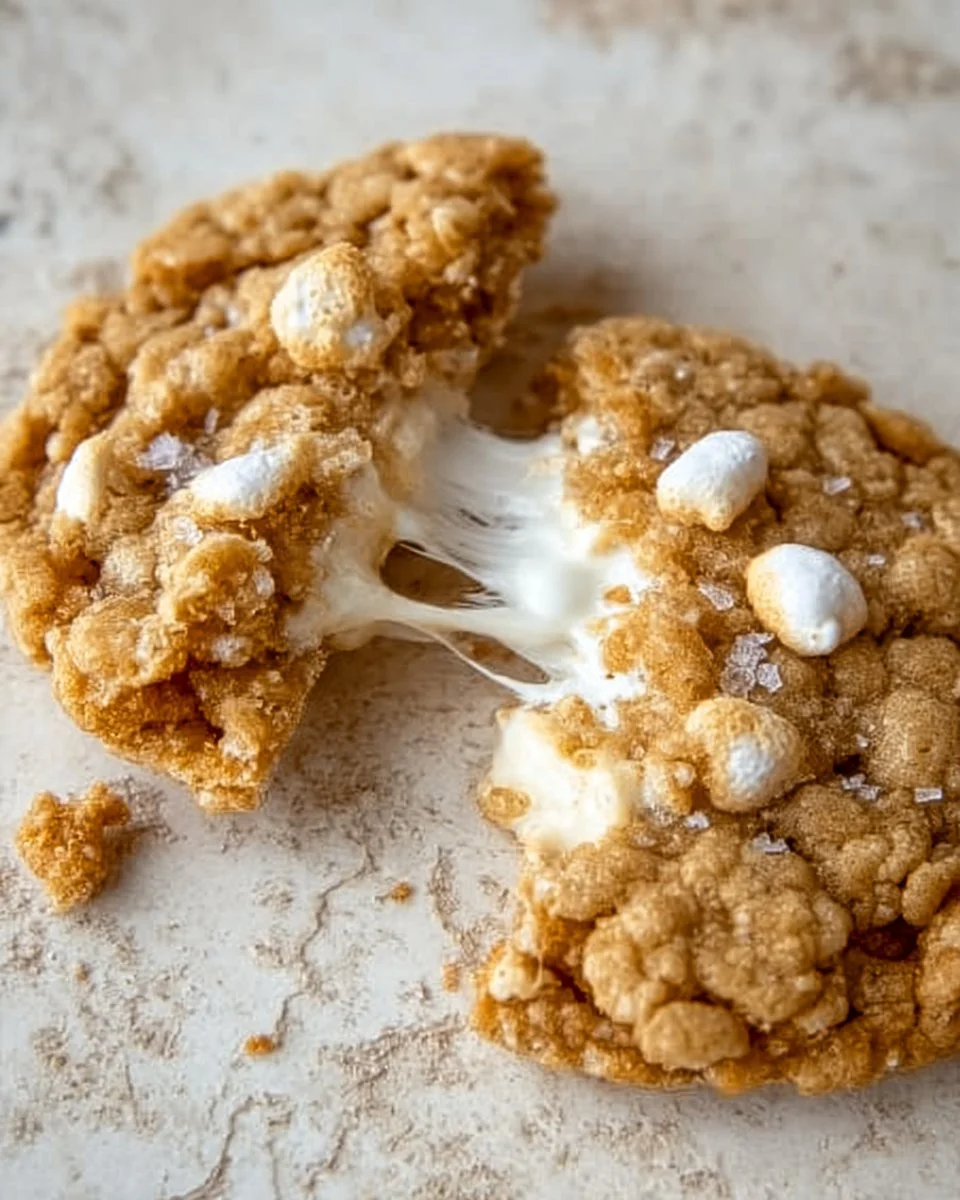
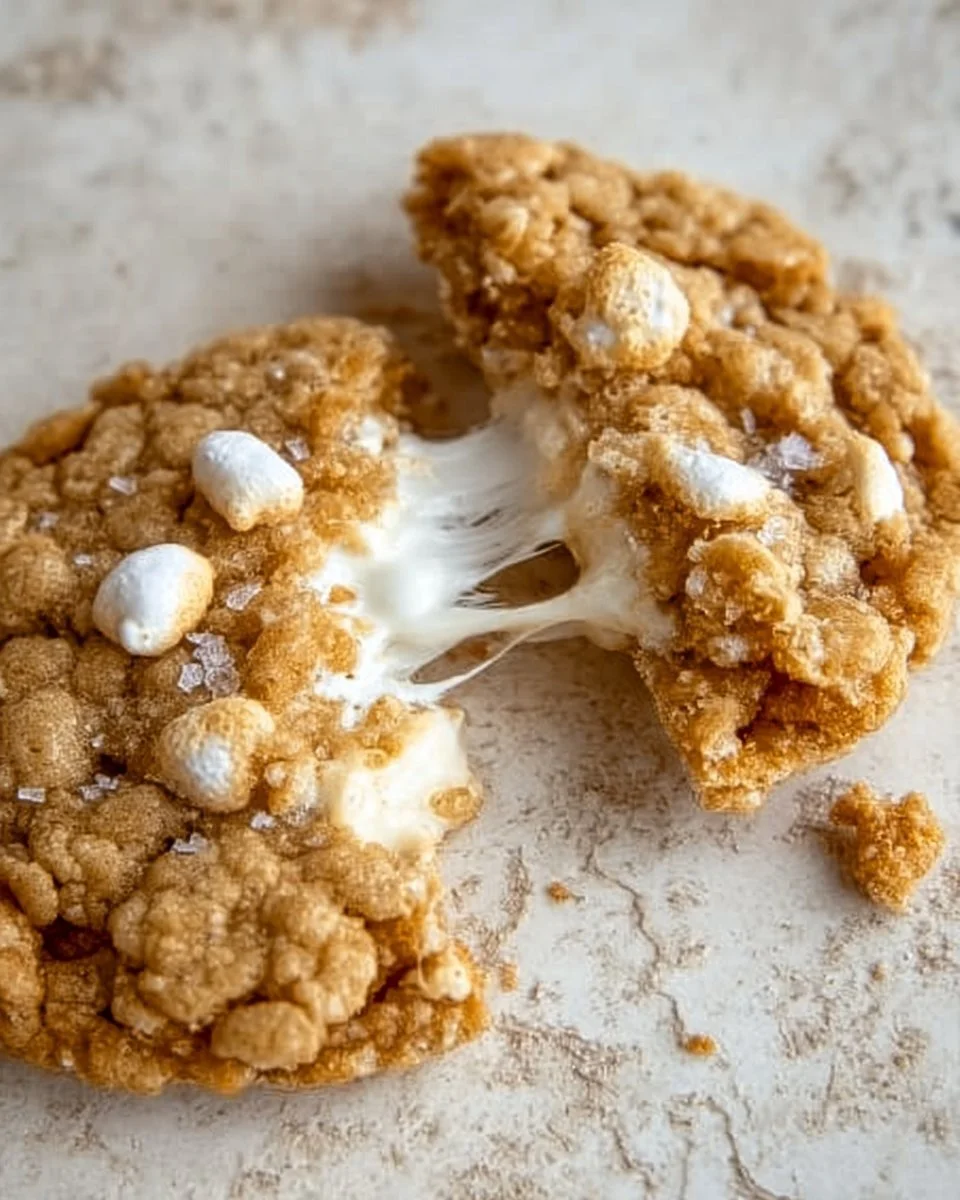
Welcome to a delightful journey of flavors with these Brown Butter Marshmallow Crispy Cookies! If you’re searching for a recipe that combines the comforting taste of cookies with the nostalgic crunch of Rice Krispies, you’ve found it. This treat is not only simple and quick to whip up but also delivers a unique twist on the classic cookie that everyone loves. The rich, nutty aroma of brown butter enhances the flavors, while the gooey marshmallows bring a delicious sweetness. Perfect for sharing with family and friends, these cookies are bound to become a favorite!
The Magic Behind These Cookies
What makes this recipe so special? First, it’s incredibly easy to prepare, making it ideal for both novice bakers and seasoned pros. With just a handful of ingredients, you can create a batch of cookies that feels indulgent without breaking the bank. The combination of brown butter and sugars adds depth, flavor, and texture, while the addition of Rice Krispies provides that satisfying crunch. In just a short time, you can treat yourself to fresh, homemade cookies that everyone will admire!
A Simple Overview of the Recipe
This delightful recipe comes together in a few straightforward steps. Begin by preparing your ingredients and preheating the oven. The secret to the irresistible flavor lies in browning the butter, which contributes a lovely nuttiness to the cookies. Once the wet and dry ingredients are combined, you’ll fold in the Rice Krispies and mini marshmallows for that signature chewy texture. After a brief baking period, you’ll have glorious cookies ready to impress!
Ingredients
Before you dive into making these cookies, here’s what you’ll need:
- Prep Time: 15 minutes
- Cook Time: 10-12 minutes
- Total Time: 25-27 minutes
- Servings: Approximately 24 cookies
- 1 cup unsalted butter
- 2 cups mini marshmallows
- 2 cups Rice Krispies cereal
- 1 cup brown sugar
- 1/2 cup granulated sugar
- 1 teaspoon vanilla extract
- 1/2 teaspoon salt
- 1 teaspoon baking soda
- 2 cups all-purpose flour
- 1 egg
Step-by-Step Instructions
Now let’s get baking! Follow these easy steps to create your Brown Butter Marshmallow Crispy Cookies:
- Preheat your oven: Start by preheating your oven to 350°F (175°C). This ensures that your cookies bake evenly and attain that perfect golden color.
- Browning the butter: In a saucepan, melt the unsalted butter over medium heat. Keep an eye on it as it heats; you’ll want it to turn golden brown and provide a nutty aroma. Once that happens, remove it from heat and let it cool slightly.
- Mixing the butter and sugars: In a large mixing bowl, combine the browned butter with both brown sugar and granulated sugar. Mix well until you see a smooth texture.
- Incorporating the egg and vanilla: Add the egg and vanilla extract to the butter-sugar mixture, stirring until everything is well incorporated.
- Preparing the dry ingredients: In another bowl, whisk together the all-purpose flour, salt, and baking soda. Gradually add this mixture into the wet ingredients, stirring until just combined. Be careful not to overmix, as this can affect the texture.
- Adding the crunchy and gooey goodness: Gently fold in the Rice Krispies and mini marshmallows, ensuring they are evenly distributed throughout the dough.
- Shaping the cookies: Using a spoon or cookie scoop, drop spoonfuls of the cookie dough onto a lined baking sheet. Give them space, as they will spread while baking.
- Baking: Bake in the preheated oven for 10-12 minutes or until the edges are golden brown. Remember, the cookies will continue to cook a bit after being removed from the oven.
- Cooling: Let them cool on the baking sheet for a few minutes before carefully transferring the cookies to a wire rack to cool completely. This helps them set and become chewy.
Perfect Pairings for Your Cookies
These Brown Butter Marshmallow Crispy Cookies are delicious on their own, but a few thoughtful serving suggestions can elevate your treat even further. Consider pairing these cookies with:
- A glass of cold milk
- Hot cocoa or coffee for a cozy afternoon
- Ice cream sandwiches—just put a scoop of your favorite ice cream between two cookies!
- Packaged as homemade gifts in decorative bags or boxes for special occasions like birthdays or holidays.
Storing and Reheating Your Delicious Cookies
Once your cookies have cooled, it’s essential to store them properly to maintain their freshness. Here are some effective methods:
- Room Temperature: Place the cookies in an airtight container at room temperature, where they will remain fresh for up to a week.
- Refrigeration: For extended freshness, you can refrigerate them. Ensure they’re sealed in a container to avoid drying out, and they will last for about two weeks.
- Freezing: If you want to store them for longer, freeze the cookies. Place them in a single layer on a baking sheet until solid, then transfer them to a freezer bag or airtight container. They’re great for up to three months!
When you’re ready to enjoy your frozen cookies, let them thaw at room temperature or gently reheat them in the microwave for about 10-15 seconds to restore that just-baked goodness.
Expert Tips for Success
To ensure your cookies turn out perfectly every time, keep these handy tips in mind:
- Don’t rush the butter-browning process: This step significantly enhances the flavor; take your time to achieve that golden hue.
- Measure flour accurately: Use the spoon-and-level technique for measuring flour to avoid cookies that are too dry.
- Watch the baking time: Since oven temperatures can vary, keep a close eye on the cookies starting at the 10-minute mark for the best results.
- Experiment with mix-ins: Feel free to substitute or add ingredients like chocolate chips, nuts, or other types of cereal for variety!
Delicious Variations to Try
If you’re looking to switch things up with your Brown Butter Marshmallow Crispy Cookies, consider these variations:
- Chocolate Chip Addition: Add 1 cup of semi-sweet or dark chocolate chips for a richer flavor.
- Nutty Twist: Incorporate chopped nuts such as walnuts or pecans for added texture and flavor.
- Seasonal Flavors: In fall, try adding pumpkin spice, or in the summer, add a hint of orange zest for a refreshing touch.
Frequently Asked Questions
- Can I use margarine instead of butter? While it’s possible, butter provides a better flavor and texture, particularly when browning it.
- How can I make these cookies gluten-free? Substitute all-purpose flour with a gluten-free flour blend, ensuring it contains a binding agent like xanthan gum.
- Why are my cookies spreading too much? This may occur if your butter was too warm or you added too much flour. Be sure to measure your ingredients carefully!
- Can I prepare the dough in advance? Absolutely! You can chill the dough in the fridge for up to 24 hours before baking.
- What should I do if my cookies are too hard? If your cookies turned out hard, consider broiling them for a few seconds to soften them again or dunk them in milk!